IF YOU’VE BEEN following this series, understand of how page and section breaks can help you organize your document. Today, I’m going to give you an overview of how to handle headers, footers, and page numbering. And because I’m writing this series with writers in mind, I’m going to focus on issues specific to longer documents.
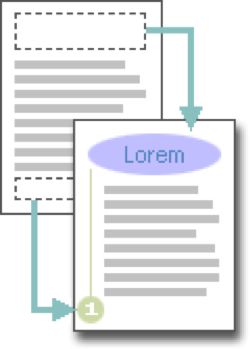
Headers and footers are areas in the top and bottom margins of each page in a document. Anything placed on a header or footer is repeated across pages within a document or within specified sections of a document. (See Word for Writers, Part 8: Section Breaks.) And page numbers fields inserted into headers or footers are automatically calculated. (Can you imagine entering every page number in your book manually?)
What This Post Covers
- Add a header or footer
- Make the first page header or footer different from the other pages
- Add different headers or footers for different sections of your document
- Quickly navigate between headers and footers
- Use different odd and even page headers and footers
- Edit and delete headers or footers
- Insert and format page numbers
- Insert special text and other objects into headers and footers
The Header/Footer Design Tab
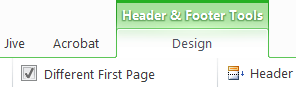
Whenever your cursor is located within a header or footer, the HEADER AND FOOTER tab will appear on the ribbon. (It is context sensitive and so does not appear unless you are actually working within a header or footer.) In Word for Windows, the tab is titled HEADER & FOOTER TOOLS DESIGN. To save space, for the remainder of this article, when I refer to the HEADER AND FOOTER tab, I’m including both versions.
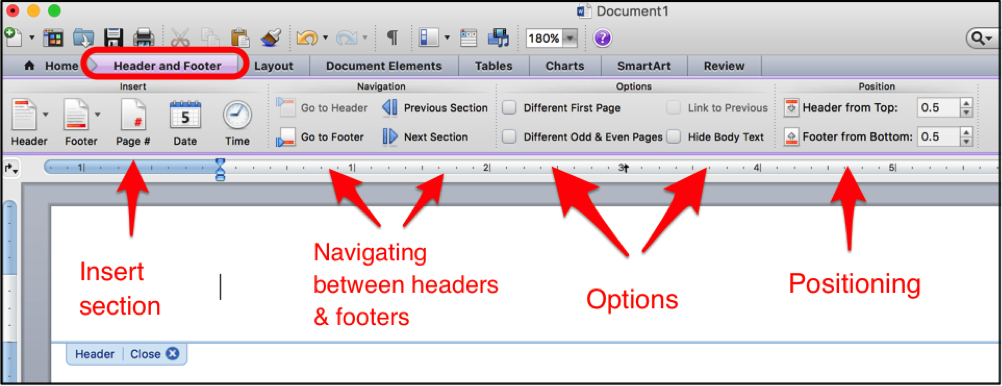
Let’s take a look at the different sections of the HEADER AND FOOTER tab on the PC.
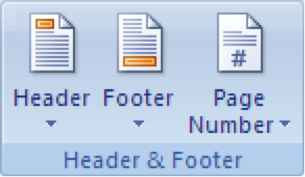
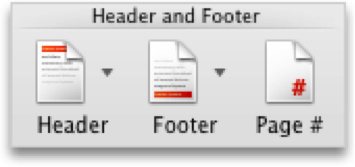
- The Header & Footer section allows you to insert pre-formatted style of headers and footers, as well as auto-calculated page number fields.
– - The Insert section is for adding date and time fields, Quick Parts, Pictures, and Clip Art (I will not be covering this section in this post)
– - The Navigation section helps you to navigate quickly to different headers and footers in a longer document.
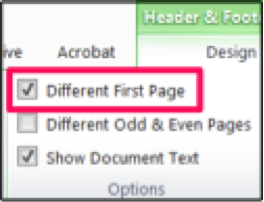
– - Options gives you flexibility and control over whether the headers/footers will be different or the same as this of previous sections. You can also specify a different first page header/footer or odd and even headers and footers.
– - In the Position section, you can define how from from the top or bottom of the document you want the headers to start.
– - The Close button, to close the header and return to the document.

Now let’s take a look at the different sections of the Header and Footer tab on the Mac.
- The Insert section allows you to insert pre-formatted style of headers and footers, as well as auto-calculated page number, date, and time fields.
– - The Navigation section helps you to navigate quickly to different headers and footers in a longer document.
– - Options gives you flexibility and control over whether the headers/footers will be different or the same as this of previous sections. You can also specify a different first page header/footer or odd and even headers and footers.
– - In the Position section, you can define how from from the top or bottom of the document you want the headers to start.
Adding a Header or Footer to a Document
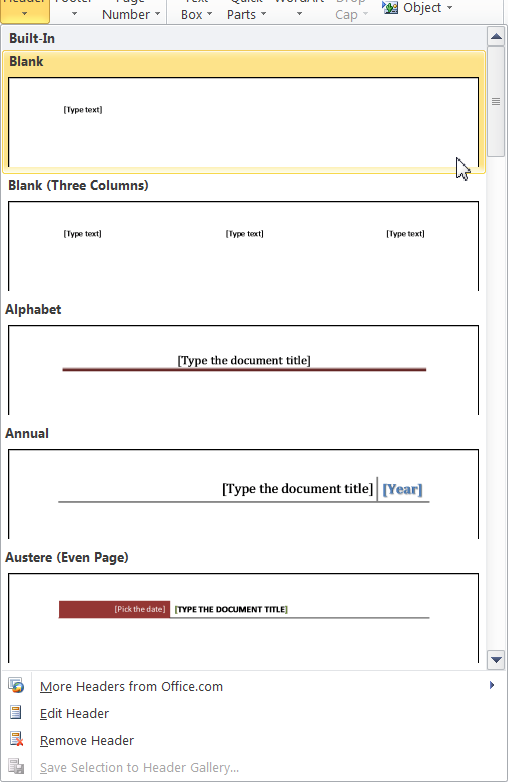
Microsoft Word comes with predesigned header and footer styles that you can insert, or you can create a header or footer of your own design. Personally, I prefer creating my own, but I encourage you to play around with Word’s existing styles. If you find something you like, using built-in styles can save time.
There are several ways to access and add headers and footers.
| Word for Windows 2010* | Word for Mac 2011* |
OR
|
To select a pre-designed header or footer do any of the following:
OR
|
By default, when you add a header or footer to a document, it will automatically be applied to all documents.
–
Make the first page header or footer different from the other pages
At times, you may want the first page of a document or a chapter to have no headers or footers, or to have different headers or footers. To accomplish this:
- Double-click in the header or footer of the document to reveal the HEADER AND FOOTER tab.
– - Select the tab.
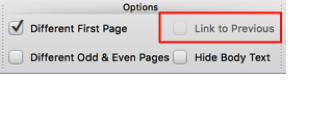
– - Select the Different First Page checkbox.
Mac:
![]()
PC:
- Word will automatically remove the header and footer on the first page. You can then leave it blank or enter the header/footer you want on that page.
Add different headers or footers for different sections of your document
If you have a manuscript or longer document, may want different headers or footers for each section or chapter. For example, you might want your header to include your chapter title. To accomplish this:
- First, divide your document into sections as described in the previous post, Part 8.
– - Create your headers and footers for the first section of your document. These will automatically be displayed throughout the document.
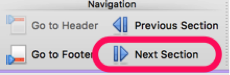
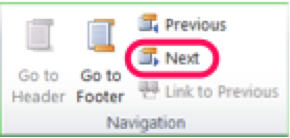
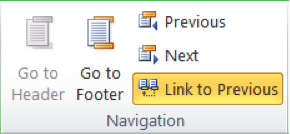
– - With your cursor in the header or footer section, click Next Section (on the Mac) or Next (PC) in the Navigation section of the HEADER AND FOOTER tab to jump to the next section.
Mac:
PC:
- On the Mac, Uncheck the Link to Previous checkbox in the Options section of the HEADER AND FOOTER tab.
- On the PC, Uncheck the Link to Previous button in the Navigation section of the HEADER AND FOOTER tab.
- Changes made to the header or footer in either section of the document will now apply only to that section.
Add different headers or footers for odd and even pages
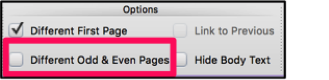
- With your cursor in the header/footer, select the HEADER AND FOOTER tab.
– - Check the “Different Odd & Even Pages” option.
Mac:
PC
- Whatever you enter on the odd-numbered header/footer will now repeat across all odd-numbered pages in that section or document, and whatever you enter on the even-numbered header/footer will now repeat on even-numbered pages.
– - Note: If the document already had a header/footer, then the existing header or footer will be configured for the odd-numbered pages only. If this is the case, click Next Section (Mac) or Next (PC) to advance the cursor to the header or footer for the even-numbered pages.
Edit or Delete Headers and Footers
- To edit Headers/Footers, simply double-click in the header or footer you want to change and make the changes as you would any the body of the document.
– - To delete headers/footers, double-click the header or footer you want to remove. On the Edit menu, click Select All, and then press DELETE. To return to your document close the header by pressing the Close button.
Inserting Page Numbers
To Insert a page number in any header or footer:
- Double-click the header or footer where you want to insert the page number and select the HEADER AND FOOTER tab.
– - Position the cursor where you want to insert the page number.
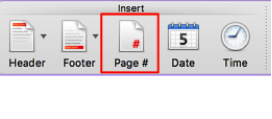
On the Mac, tap the Page# icon on the Insert section.
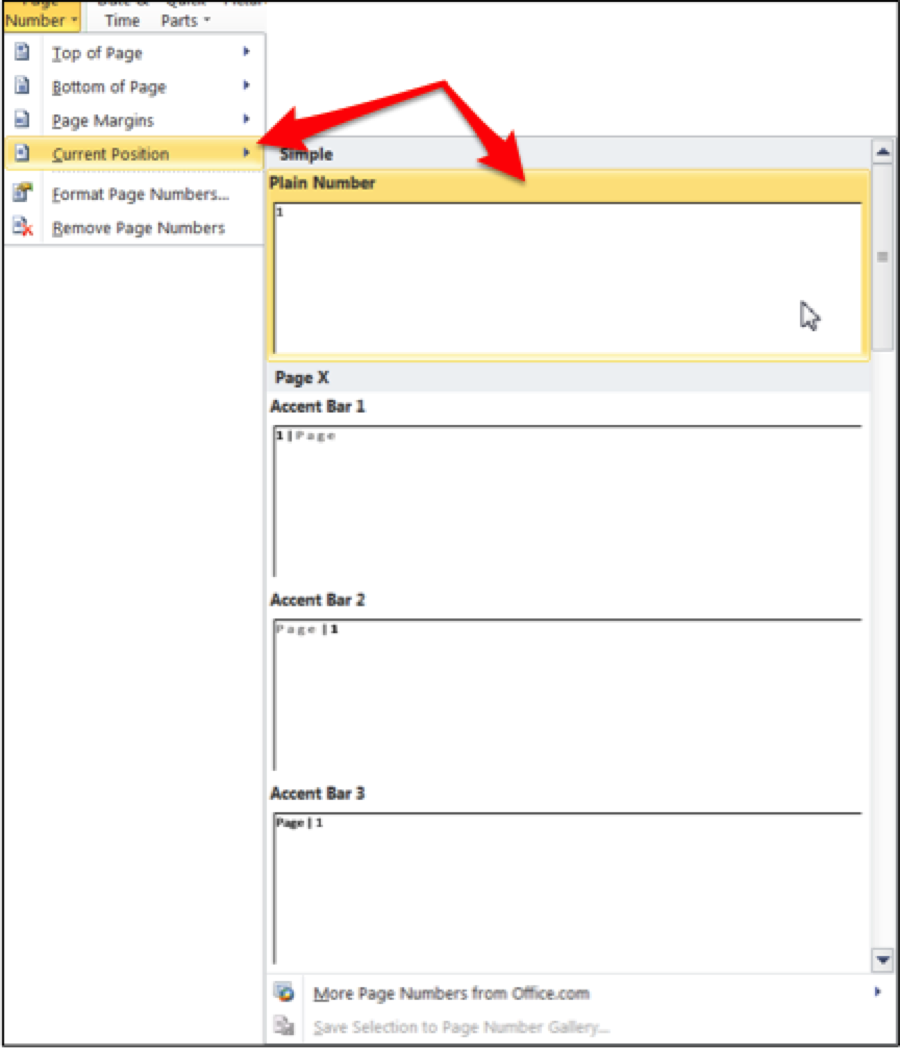
On the PC, select the Page Number icon on the Header and Footer section of the INSERT or the HEADER AND FOOTER tab. A menu will drop down. From there, choose Current Position (or any other position you prefer), and select from the various pre-formatted styles in the submenu. If you want to format the number yourself, select Plain Number and then format after the number has been place in the header/footer.
–

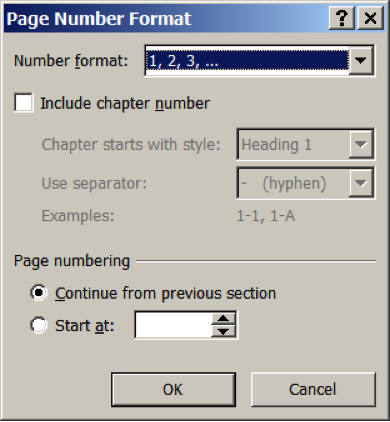
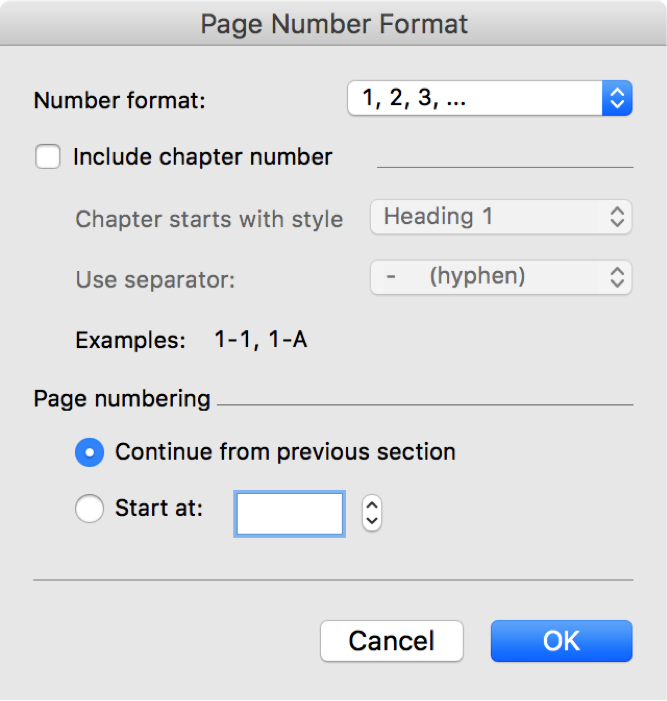
Formatting Page Numbers
Imagine that you want page 1 to start after the introduction and table of contents of your document. Or you want your front matter to be formatted with small roman numeral page number (i, ii, iii). Or you want each section of your document to be numbered differently. To determine the starting number for your section or use alternate numbering schemes:
Inserting Special Text and Other Objects into Headers/Footers
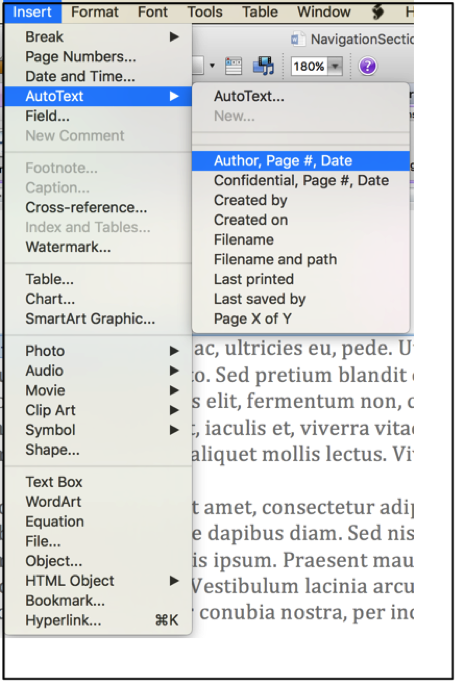
Pretty much anything you can insert into the body of documents — pictures, clipart, charts, videos, smart-art, and so on — you can insert into a header or footer. Typically, you might want to insert an auto-calculated date, or the document author’s name, or filename and saved path (so you know where it’s saved on your computer.
To learn more, explore the Insert AutoText menu item on the Mac.
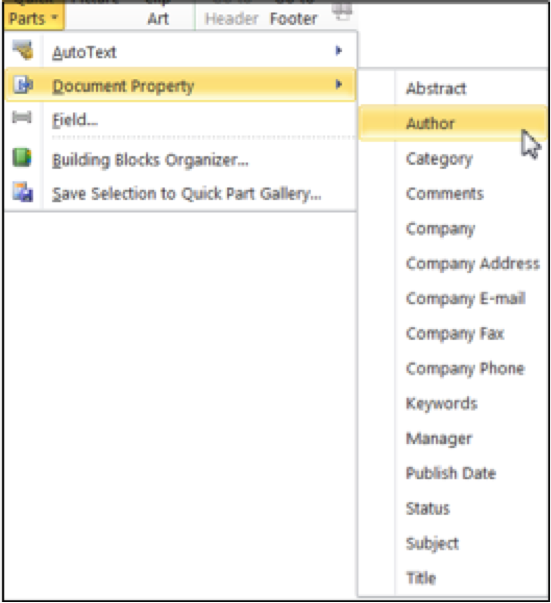
And the QuickParts menu on the PC.
Try This
- Open a new word document and save it with a new name, something like, “Headers and Footers Test.”
– - Copy and Paste several pages of text into the document from another document.
– - Using the directions in this post, add a header to the first page of the document.
– - Make the header on the first page different from the header on the rest of the document.
– - Add a Next Page Section Break midway through the document.
– - Navigate back and forth between section headers and footers using the Next and Previous buttons in the Navigation section of the Footer and Header tab.
– - Navigate to the second section of the document and uncheck the Link to Previous button.
– - Change the header and/or footer in the second section. Review the document to see the differences.
– - Create Odd and Even headers in the second section.
– - Insert Page numbers in the footers. Play with linking and unlinking the footers to previous to see what happens.
How does having more control over headers and footers help you with your current writing project?
________________________________________________
Additional Resources
For additional formatting help with Word, get my book: Publish Your Chapbook! Six Weeks to Professional Publication
Microsoft has some wonderful training resources at their website. Click here for detailed lessons on headers and footers for Word 2010, and here for a brief overview of headers and footers for Word for Mac 2011.
* Why Word for Windows 2010 and Word for Mac 2011? When I started this series, Word for Mac 2011 was the latest version for the Macintosh, and Word for Windows 2013 for the PC. The latest version for Mac, released late in 2015, is Mac 2016 (there were no new major versions between 2011 and 2016 for the Macintosh). For consistency, I decided to complete the series with the versions I started with. If you have older or newer versions of Word, most of these features exist under different menus and/or tabs.
________________________________________________


I love reading these posts on using a writer’s tools. Though I have yet to practice some of them, they are all at my fingertips when I need them. Thank you for doing this series.
You’re welcome, Patsy!
I love reading these posts on using a writer’s tools. Though I have yet to practice some of them, they are all at my fingertips when I need them. Thank you for doing this series.
You’re welcome, Patsy!